Materials Lab and Studio Spaces
If you think it, you can make it. Learn how our facilities support student creativity.
The Materials Lab provides space, equipment, and trained personnel to assist design students in their work. Design ideas that originate in the studio can be implemented in three dimensions in the Materials Lab. Full-scale working prototypes and scaled models can be made to present design proposals.
Though College of Design students must provide their own materials for projects, the Materials Lab includes a complete wood shop, metal shop, paint booth and laser-cutting machines. The lab employs a range of equipment from traditional hand tools to modern CNC equipment. College of Design students may work in a range of materials including plastic, concrete, and fabrics. Power- and hand tools are available for checkout by students currently enrolled in Design courses.
Fibers and Dye Studio
Location: 230-230A Leazar Hall
Access: Monday – Friday: 24-hour secured access (must have code to access the lab) Note: Must be registered/enrolled for an Art + Design course. Saturday & Sunday: 24-hour secured access (closed most holidays) | (must have code to access the lab) Note: Must be registered/enrolled for an Art + Design course.
Equipment:
- 4 burner stove sealed glass cooktop
- vented stovetop hood
- set of scales
- large stainless steel sink
- eyewash station
- assorted steamers
- UV exposure and vacuum table
- 5′ x 20′ fabric print table/storage cabinets
- 2 dye storage cabinets (locked)
- 6 color, 4 station carousel silkscreen press
- silkscreen storage rack
- washing machine and dryer
- 2 knitting machines / Brothers 260 + 860
- Large T-squares for print tables (registration boards)
- Misc. PVC tubes and stainless steel tubes
- inventory cabinets in the kitchen
- 2 Industrial reliable 4 thread sergers
- 4 industrial Juki Straight Line Machines
- 4 industrial Walking Foot Machines
- 10 Bernina 1005 Sewing Machines
- 6 Singer Light Duty portable machines
- Reliable stream press
- High steam iron and vacuum board
- 2 steam ironing stations
- 35 dress forms in various sizes
- Commercial refrigerator
- Hepa-filtered dye mixing cabinet/scales
- Screen drying cabinet
- Screen exposure and vacuum table
Materials Lab – Wood Shop
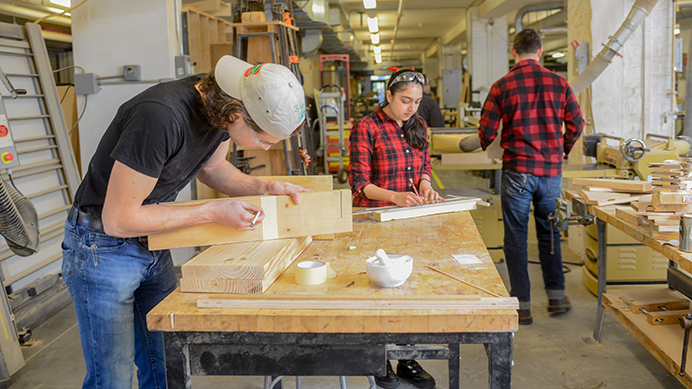
Location: 220 Leazar Hall
The Materials Lab provides space, equipment, and trained personnel to assist design students in their work. Design ideas that originate in the studio can be implemented in three dimensions in the Materials Lab. Full-scale working prototypes and scaled models can be made to present design proposals.
Take a virtual tour of the Materials Lab:
Materials Lab – Metal Shop
Location: 220 Leazar Hall
Access: Accessed during posted hours only. Must attend safety orientation and be enrolled in the College of Design.
Hours of Access:
- Monday – Thursday: 10 am – 5 pm and 6 pm – 10 pm
- Friday: 10 am – 5 pm
- Saturday & Sunday: 1 pm – 5 pm (closed most holidays)
Equipment:
- 13″ machine lathes
- Vertical knee mills
- Bridgeport CNC vertical knee mill
- Southwest Industries CNC vertical bed mill
- 17″ drill press
- 8″ surface grinder
- 52″ foot sheer
- 32″ foot sheer
- 24″ slip roller
- 36″ slip roller
- 48″ magnetic finger brake
- 30″ mechanical finger brake
- 30″ bar brake
- 72″ sheet metal brake
- Horizontal metal cutting band saw
- Tinsmithing hammers and anvils
- Hossfield metal bender
- Hydraulic tubing bender
- Pullmax metal former
- CNC Plasma Cutter
- Omax ProtoMax CNC water jet cutter
Materials Lab – Welding Shop and Miscellaneous Items
Location: 220 Leazar Hall
Access: Accessed during posted hours only. Must attend safety orientation and be enrolled in the College of Design.
Hours of Access:
- Monday – Thursday: 10 am – 5 pm and 6 pm – 10 pm
- Friday: 10 am – 5 pm
- Saturday & Sunday: 1 pm – 5 pm (closed most holidays)
Equipment:
- MIG welder
- TIG welder
- Plasma cutters
- Oxygen/Acetylene torch
- Spot welder
- 2.5 cu in oven
- 2.5 cu in kiln
- Spray booth
- Sandblast cabinet
- 24′ x 24′ vacuum former